How to Take Progress Photos That Actually Show Change (Trackr Guide)
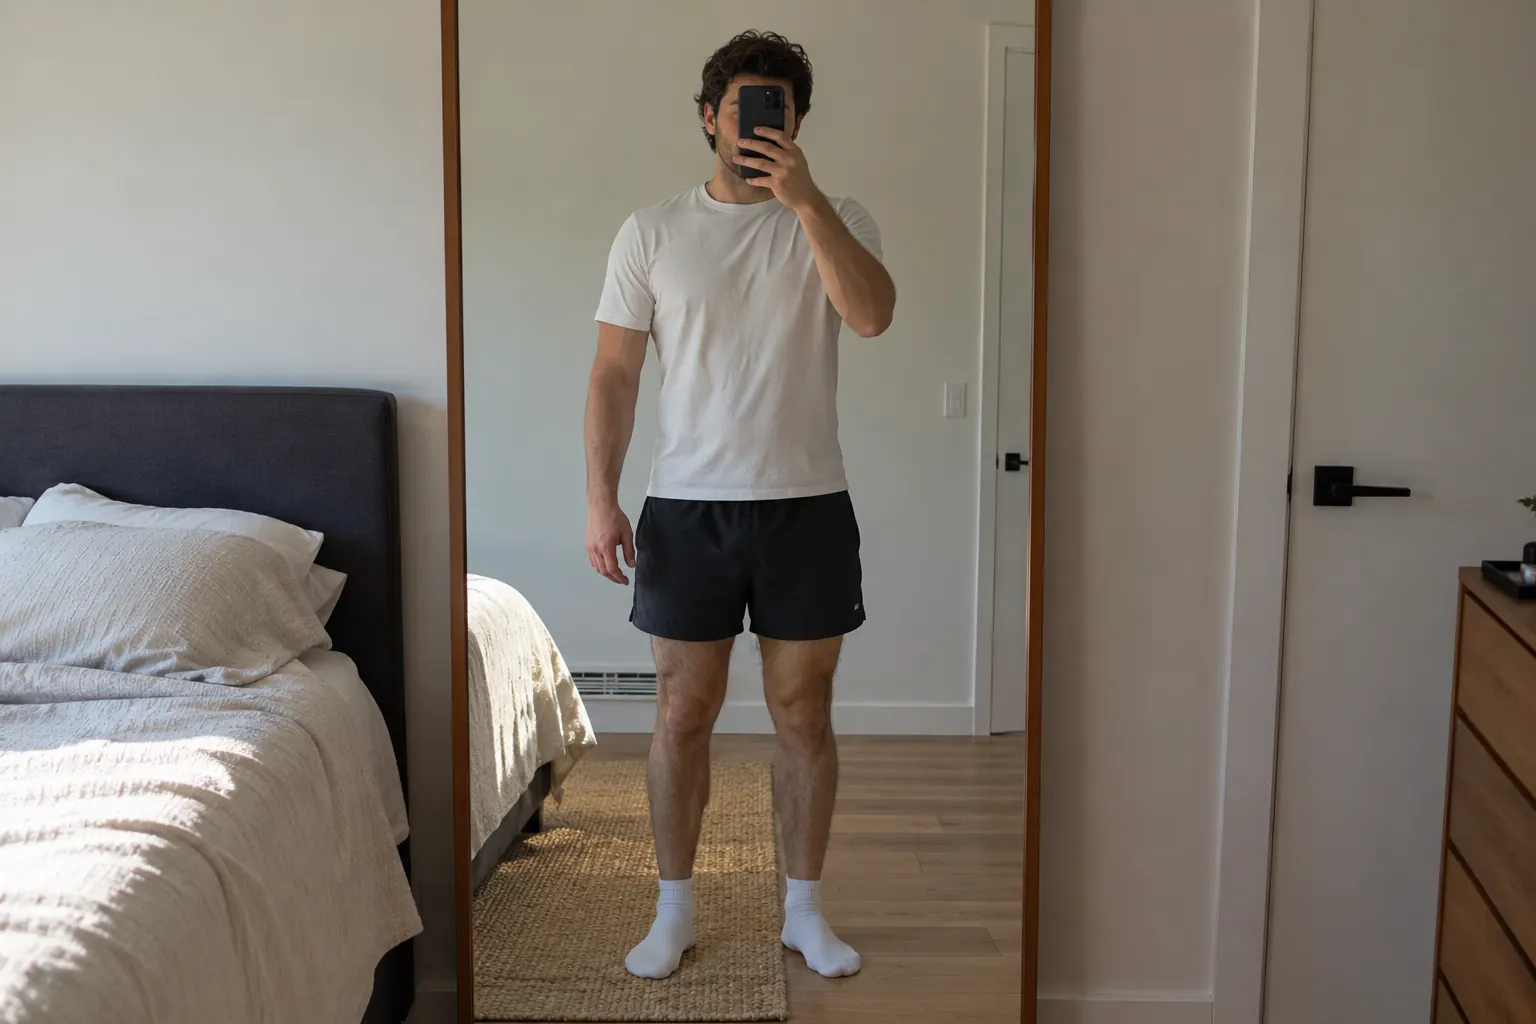
Most progress photos fail before the shutter ever clicks. Different lighting, a different mirror, a slightly different angle, and suddenly you can't tell whether you lost fat or just stood closer to the window. Then you compare two photos taken four weeks apart, see nothing, and conclude the training isn't working. Often it is working. The photos just weren't taken in a way that could show it.
This guide covers how to take progress photos properly: the setup, the poses, how often to shoot, and how to actually read what you see. None of it requires equipment beyond the phone you already own. It just requires consistency, which is harder than it sounds and exactly why most people get it wrong.
Why photos beat the scale
The scale gives you one number, and that number is noisy. Water, glycogen, sodium, what you ate last night, where you are in your cycle. Day to day, your weight can swing by a kilogram or more without any real change in body composition. Worse, the scale can't tell the difference between losing fat and losing muscle, or between gaining muscle and gaining fat.
Photos can. If you're in a recomposition phase (building muscle while losing fat), the scale might not move for two months while your body visibly changes shape. Waistline tighter, shoulders rounder, the vague outline of an ab. Without photos, that entire phase reads as "no progress" and people quit right when things are working. The photo is the record that keeps you honest in both directions: it shows change the scale hides, and it refuses to flatter you when nothing has actually changed.
The one rule: control every variable except your body
A progress photo is a before and after experiment, and your body is the only variable you want changing between shots. Everything else (light, angle, distance, clothing, pose, time of day) needs to stay fixed. Every variable you let drift becomes noise, and after a few weeks the noise is louder than the signal.
Lighting: overhead, consistent, never a window
Lighting is the biggest offender. Photographers manipulate light to create or erase definition all the time. Harsh overhead light carves out abs that soft frontal light completely flattens. If your week one photo was taken in soft morning window light and your week eight photo under a bathroom bulb, you're comparing lighting setups, not bodies.
Pick one room with a consistent artificial light source, ideally overhead, and use it every time. Close the curtains so daylight can't interfere. Daylight changes with weather, season, and hour, and you can't control any of those. Artificial light is boringly repeatable, which is exactly what you want.
Angle and distance: mark the spot
Prop your phone against the same shelf or use a small tripod, somewhere between hip and chest height, and put a piece of tape on the floor where your feet go. It feels excessive until you see what a camera can do: shot from below you look taller and leaner; from above, shorter and heavier. Six inches closer to the lens and your proportions shift. A tape mark and a fixed phone position eliminate all of it in ten seconds.
Use the rear camera with the timer, not a mirror selfie. Mirror shots lock one arm into holding the phone, add glass reflections and smudges, and make your framing depend on how you're standing that day. The timer frees both arms for proper poses and keeps the frame identical.
Clothing: same outfit, minimal coverage
Wear the same thing in every photo, and keep it minimal: shorts for men, shorts and a sports bra for women. Loose clothing hides the exact areas you're trying to track. And resist upgrading the outfit when you start feeling better about yourself; the moment you switch from baggy shorts to fitted ones, your photo history breaks in half. Same goes for grooming, tan, and anything else that changes how skin reads on camera.
Time of day: morning, before anything
Shoot in the morning, after the bathroom, before food or water. This is your least inflated, most repeatable state. An evening photo after a salty dinner and a hard workout can look dramatically different from a morning photo of the same body. Morning and fasted is the standard because it's the one condition you can reproduce every single time.
The poses that actually tell you something
You don't need a bodybuilder's posing routine. Four shots cover almost everything:
- Front, relaxed. Arms slightly away from your sides, feet on the tape mark, breathing normally. Not sucked in, not pushed out. Just standing. This is your most honest photo and the hardest one to take, because every instinct says to flex or straighten up. Don't.
- Side, relaxed. Turn ninety degrees, arms hanging naturally. This is where fat loss shows first for most people: the stomach profile changes before anything on the front view does.
- Back, relaxed. The view you never see and the one where back development, posture, and love handles live. Awkward to set up, which is why the timer matters.
- One flexed shot, if you want it. Front double biceps or whatever you like, but treat it as a bonus, always in addition to the relaxed set, and flex the same way each time. Histories of flexed shots alone are unreliable because flexing is a skill that improves with practice, and better flexing looks like muscle you didn't gain.
Keep your posture neutral in every shot: stand tall, shoulders where they normally sit, no sucking in the gut. The goal is a repeatable neutral, not your best angle. You're not posting these. You're collecting data.
How to take progress photos by yourself
Almost nobody has someone around to hold the camera every two weeks, and that is the part that quietly kills the habit. Shooting alone is completely workable, but it changes a few things.
- Prop the phone, don't hold it. A handheld phone lands at a different height, distance, and tilt every single time, which is exactly the variable you spent all this effort controlling. A cheap tripod is ideal. A phone leaned against a stack of books on a shelf works just as well. Mark where the phone sits with tape, the same way you marked where your feet go.
- Camera at chest height, lens level. Shooting up from hip height stretches your legs and shrinks your torso. Shooting down from eye height does the opposite. Chest height with the phone perfectly vertical is the neutral setting, and the phone's own level (or grid lines) gets you there in a second.
- Use the timer, not the mirror. Mirror shots fail twice over: the phone hides part of your torso, and bathroom mirrors bring their own lighting and slight distortion. Ten second timer, or burst mode if your phone has it, so you get several frames and keep the one where you are actually standing neutral.
- The back shot is the tricky one. Set the timer, turn around, and count it out. If you have a watch that triggers the camera, use it. Voice control works too on most phones. Either way, take two or three attempts, because you can't see what you're doing.
- Shoot one test frame before you undress. Ten seconds of checking framing beats discovering four weeks later that your head was cut off in half the set.
Once the tape marks and the phone spot are set, the whole thing takes under two minutes. That is the real reason to bother with the setup: it turns a photo session into something you'll still be doing in six months.
How often: every two weeks is the sweet spot
Daily photos are a trap. Visible body composition change takes weeks, so daily comparisons show nothing but water fluctuation, and staring at nothing every morning erodes motivation fast. Monthly works but gives you thin data.
Every two weeks hits the balance: enough time for real change to register, frequent enough to build a dense history. Put it on a recurring calendar slot (say, every other Sunday morning) so it becomes automatic rather than a decision that depends on your mood. The people with useless photo histories aren't the ones who chose the wrong interval; they're the ones who shot whenever they happened to feel lean. If keeping any schedule like this has failed you before, the fix is usually the routine rather than the willpower, and we wrote a separate guide on building a tracking habit that sticks.
Reading your photos: muscle vs. fat, and the right comparisons
The first skill is patience with the timeline. Never compare this week to last week. Compare today to six, eight, twelve weeks ago. Adjacent photos almost always look identical; that's normal and means nothing. The comparison that matters is the long jump.
The second skill is knowing what each kind of change looks like. Fat loss shows up as sharper edges: the waistline in the side shot pulls in, the jawline tightens, existing muscle gets more visible even though it hasn't grown. Muscle gain shows up as changed silhouette: shoulders wider relative to the waist, legs filling the same shorts differently, the back photo getting broader. If your weight is flat but the side shot is shrinking while your shoulders look fuller, that's recomposition: the exact outcome the scale is structurally incapable of showing you.
Pair photos with the scale rather than replacing it. Weight trend plus photo trend together tell you what's actually happening: weight down and photos unchanged over twelve weeks might mean muscle loss; weight flat and photos improving means keep doing exactly what you're doing.
The psychology: why this works when motivation doesn't
You see yourself in the mirror every day, which makes you the worst possible judge of your own gradual change. The brain normalizes slow shifts. It's the same reason you don't notice a child growing but a relative who visits twice a year does. Progress photos are that relative who visits twice a year, on demand.
This matters most in the middle stretch of any fitness effort (weeks six through sixteen, roughly), when novelty has worn off and results feel invisible. That's where most people quit. A side by side comparison with week one is often the single strongest counterargument available, because it's not a feeling or a number; it's your own body, on record. Plenty of people who "saw no results" pull up their week one photo and go quiet.
It cuts the other way too, and that's just as valuable. If twelve weeks of photos genuinely show nothing, you don't need more motivation. You need to change the program or the diet. Photos convert vague frustration into a concrete decision.
Common mistakes that ruin photo histories
- Changing the setup halfway through. New apartment, new mirror, new lighting, and the history splits into incomparable eras. If you must move, rebuild the setup as closely as possible and note the change.
- Only shooting on good days. Skipping photo day because you feel bloated biases your entire record toward your best moments and makes real progress invisible. Shoot on schedule, regardless.
- Sucking in or subtly flexing "relaxed" shots. You're only lying to the one person the photos are for.
- Using filters or auto enhancement. Turn off beauty modes and smart HDR adjustments if you can; they alter contrast and skin rendering unpredictably between shots.
- Letting photos rot in the camera roll. Progress photos buried between screenshots and dog pictures never get compared. If they're not organized and dated somewhere you can view them side by side, they may as well not exist.
Keeping the record in one place
That last mistake is the quiet killer, and it's the reason we built photos directly into Trackr. Each weight entry can carry a progress photo, so the photo and the number live on the same timeline. You scroll back through your history and see the week one shot next to the week one weight, then watch both move together. No digging through the camera roll, no guessing which photo was from which month.
Whatever tool you use (Trackr, a dedicated album, a folder on your laptop), the requirement is the same: dated, organized, and viewable side by side. The system matters more than the app. And if you are torn between an app and your own spreadsheet, we compared Trackr and a spreadsheet for daily tracking honestly, including where the sheet wins.
The checklist
- Same room, artificial light, curtains closed
- Phone fixed at the same height, rear camera, timer
- Tape mark on the floor for your feet
- Same minimal outfit every time
- Morning, fasted, after the bathroom
- Front, side, and back, all relaxed; flexed only as a bonus
- Every two weeks, on a scheduled day, good day or bad
- Compare across months, not weeks
- Store them dated and organized, next to your weight data
Ten minutes every other week. That's the entire cost of a photographic record that will, at some point in the next few months, be the thing that keeps you going, or the thing that tells you, clearly and without drama, that it's time to adjust. Either way, you'll know. Which is the whole point of tracking anything.
Frequently asked questions
How do you take progress photos by yourself?
Prop the phone instead of holding it, at chest height, perfectly vertical, on a spot you mark with tape. Use the ten second timer or burst mode rather than a mirror, since a mirror hides part of your torso and adds its own lighting. For the back shot, set the timer, turn around, and take two or three attempts because you cannot see the frame. Shoot one test photo before you undress to check the framing.
Should I use a mirror or a timer for progress photos?
The timer, every time. Mirror shots put the phone in front of your body, use the front camera, which is lower quality on most phones, and inherit whatever lighting and slight distortion the mirror has. A propped phone on a timer gives you the same framing week after week, which is the only thing that makes two photos comparable.
How often should I take progress photos?
Every two weeks. Daily photos show nothing but water and food weight and train you to read noise as failure. Monthly is too sparse to catch a plateau early. Two weeks is far enough apart that real change accumulates and close enough that you notice a stall while there is still time to adjust.
Why do my progress photos look worse some days?
Because you changed something other than your body. Salt, carbs, sleep, time of day, and light direction all move how you look far more than two weeks of fat loss does. That is the entire argument for the fixed setup: same room, same light, same time, same clothes. Control those and what is left on camera is actually you.